Clearing and Deleting Rows in Google Sheets
The Google Sheets connector in Workato offers actions like searching, updating, and adding rows, but it lacks native options for deleting or clearing rows. You can accomplish these tasks using custom actions. As with any data deletion, exercise caution to prevent losing valuable data.
Clearing Rows
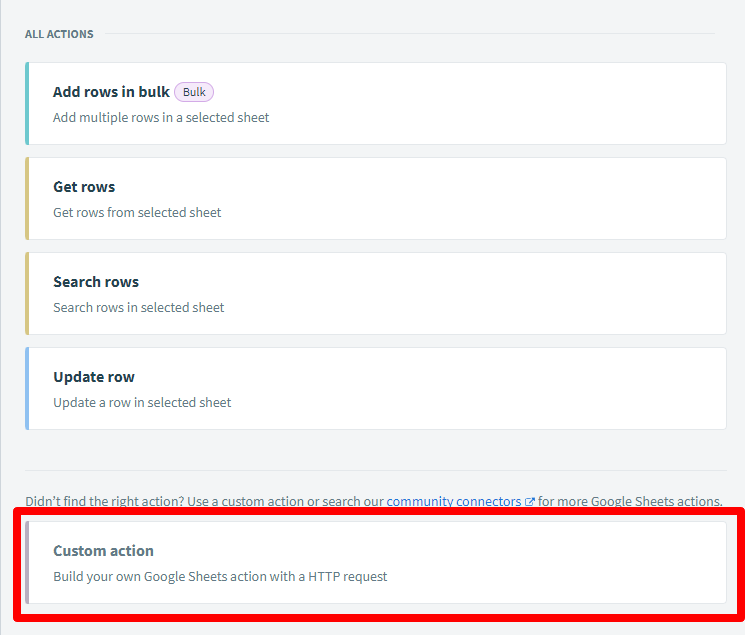
To clear rows, add a Google Sheets action step, select the Google Sheets App, and then scroll to Custom Action at the bottom of the ‘All Actions’ section.
- Name your action.
- Set the method to POST.
- Define the path as:
spreadsheets/[spreadsheet ID]/values/SheetName!R2C1:R10000C5:clear.
Replace spreadsheet ID with a hardcoded ID or use a datapill. Adjust the bolded section to specify the range you want to clear. For example, clearing data from row 2, column A to row 10,000, column E would use R2C1:R10000C5.
Deleting Rows
To delete specific rows without leaving blanks, use a Google Sheets Custom Action:
- Give your action a name.
- Set the method to POST.
- Define the path as:
spreadsheets/[spreadsheet ID]:batchUpdate.
Input JSON
Paste this JSON into the request parameters:
[
  {
    "requests": [
      {
        "deleteDimension": {
          "range": {
            "sheetId": [Sheet ID],
            "dimension": "ROWS",
            "startIndex": [Start index],
            "endIndex": [End index]
          }
        }
      }
    ]
  }
]
This provides the following inputs:
- Sheet ID: Use the spreadsheet ID or a datapill.
- Dimension: Set to ROWS.
- Start Index: Row before the row to delete (e.g., 23 if deleting row 24).
- End Index: Row to delete.

Iteration
Be cautious with For Each actions for row deletion, as row indices shift when rows are removed. To manage this:
- Create an integer variable called row_offset and initialize it to 0.
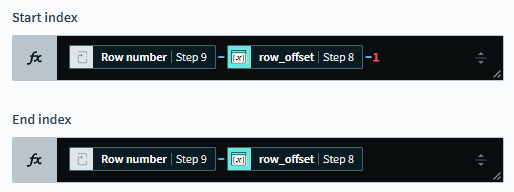
- In index boxes, use formulas such as:
Start Index: [row number] - [row_offset] - 1
End Index: [row number] - [row_offset]
Update the row_offset variable after each deletion to maintain accuracy.